

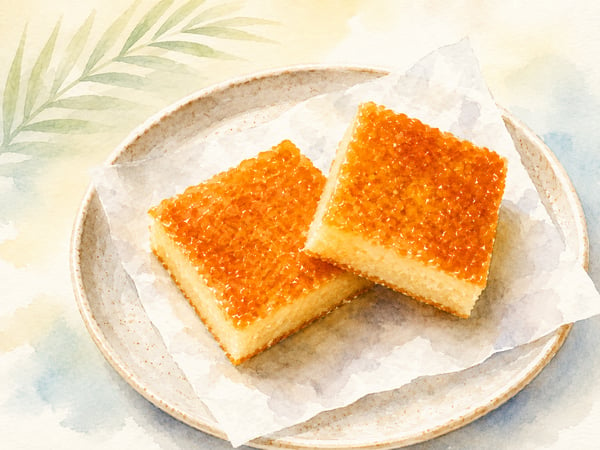
Butter mochi is the bake-sale dessert of Hawaii. Mochiko sweet rice flour, coconut milk, evaporated milk, two sticks of butter, sugar, eggs. You whisk it in two bowls, pour it into a 9x13 pan, bake an hour. The result is chewy in the center, set on top, gently sweet, unmistakably coconut. It shows up at potlucks, office shower trays, school fundraisers, baby parties, beach picnics. In my experience, most of the butter mochi I've eaten in Hawaii came from someone's auntie working off a recipe scrawled on the back of an envelope, not a cookbook.
It's the home-baked descendant of older Japanese mochi traditions that came to Hawaii with plantation-era immigrants from Japan and Okinawa starting in the late 1800s. Once Hawaii home cooks got hold of mochiko and once coconut milk became a standard pantry item, the dessert moved into a 9x13 pan and stayed there. The default sweet rice flour is the blue-bag Koda Farms Blue Star Mochiko, milled in California's San Joaquin Valley. Other glutinous rice flours work, but the texture isn't the same. If you bake butter mochi often, get the blue bag.
At a glance
One 9x13 pan (24 squares)
15 minutes
1 hour, plus 2 hours to cool
Easy
Ingredients
For the batter
- 1 lb (one 16-oz box) Koda Farms Blue Star mochiko (sweet rice flour)
- 2 cups granulated sugar
- 2 teaspoons baking powder
- ½ teaspoon salt
- 1 can (13.5 oz) full-fat unsweetened coconut milk
- 1 can (12 oz) evaporated milk
- 1 cup (2 sticks) unsalted butter, melted
- 5 large eggs
- 1 teaspoon vanilla extract
- ¼ cup shredded sweetened coconut (optional, for sprinkling on top)
Equipment
- 9x13 inch baking pan
- Two large mixing bowls
- Whisk
- Plastic knife or oiled metal knife (for cutting)
To serve
- Room-temperature, cut into 24 squares
- Coffee or hot tea on the side
Method
- Preheat the oven. 350°F. Butter or grease a 9x13 inch baking pan well — mochi sticks. Some bakers line the long sides with parchment to lift the slab out cleanly; that works too.
- Whisk the dry. In a large bowl, whisk the mochiko, sugar, baking powder, and salt until evenly distributed. Lumps in mochiko are surprisingly stubborn. Break them up.
- Whisk the wet. In a second bowl, whisk the coconut milk, evaporated milk, melted butter, eggs, and vanilla until smooth. The butter will streak at first. Keep whisking.
- Combine. Pour the wet into the dry. Whisk slowly at first, then more vigorously, until smooth with no lumps. The batter will be thinner than cake batter — closer to a thick pancake batter. That's correct.
- Pour and top. Pour into the prepared pan. If using the shredded coconut, sprinkle evenly over the top.
- Bake. 1 hour, until the top is golden brown and the center jiggles only slightly when you nudge the pan. A toothpick in the center should come out mostly clean. A little stickiness is fine — this is mochi, not cake.
- Cool completely. The hardest step. Mochi has to cool fully — at least 2 hours at room temperature — before you cut it. Hot mochi tears and shreds. Cool mochi cuts into clean squares with crisp edges.
- Cut and serve. Use a plastic knife or a metal knife sprayed with cooking oil. Both prevent dragging. Cut into 24 squares (6 cuts the long way, 4 the short way). Store at room temperature in an airtight container. Never refrigerate — refrigeration makes mochi tough. Best eaten within 2 to 3 days.
Notes from a local cook
Mochiko isn't the same as rice flour. Glutinous rice flour (mochiko, "sweet" rice flour) and regular rice flour are different ingredients. Regular rice flour will not give you the chew. If your supermarket carries the Koda Farms blue-bag mochiko in the Asian aisle, grab it. If not, any Asian grocery will have it; some Whole Foods locations stock it too, though in-store availability varies.
Cool, completely. Worth saying twice. Warm mochi out of the pan tastes underdone and the texture is gluey rather than chewy. Two hours minimum. Overnight is even better.
Variations. Swap ¼ cup of the milk for ube extract or matcha powder for purple or green versions. Use pandan extract for a more old-school plantation feel. Stir in ½ cup mini chocolate chips before baking for the kid version. None of these are wrong. The base recipe is wide open.
Plan ahead for sticky knives. If you're cutting this for a potluck, line up your serving container next to the cutting board and move each square as you cut. Stacking warm mochi pieces together fuses them back into one block.
While You're on the Islands
Eat it made by someone else. Butter mochi is a home-kitchen dessert more than a restaurant dessert, which is the most reliable thing I can tell you. For a sit-down option, Two Ladies Kitchen in Hilo is the Big Island's beloved family-run mochi shop (cash only, line out the door on weekends), though butter mochi isn't a guaranteed daily item — find it on Google Maps on Kīlauea Avenue and call ahead. Nisshodo Candy Store in Kalihi has been making mochi since the 1920s; their signature is chichi dango, and butter mochi shows up as a seasonal item — find it on Google Maps. See our broader Hawaii Eats hub for the rest of the islands' dessert scene.
Buy the ingredients fresh. The best versions come from bake-sale tables, school fundraiser boxes, and the small ladies at the KCC Farmers Market or the Hilo Farmers Market with a Tupperware on their folding table — worth a Saturday-morning detour if you want to taste a true home-cook version before trying your own.
Bring It Home
What you can substitute, what you can't: mochiko (sweet rice flour) and full-fat coconut milk are both stocked at any mainland Asian grocery store, so there's nothing here that strictly needs packing home — just know what to ask for once you're back.
Where to try this in Hawaii