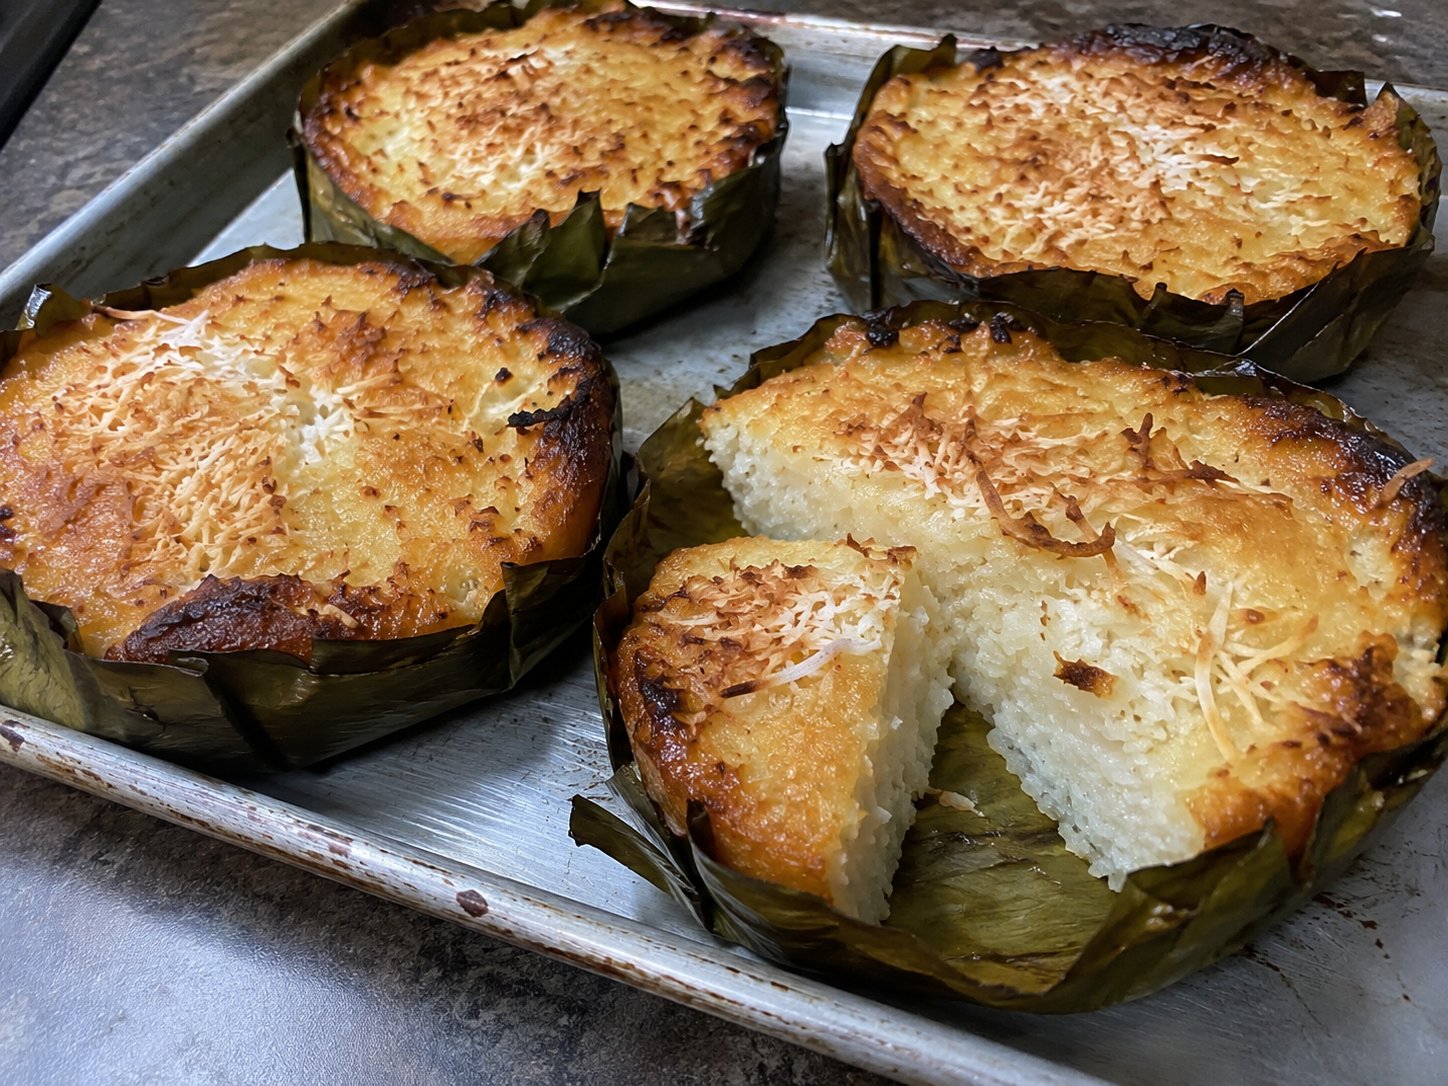

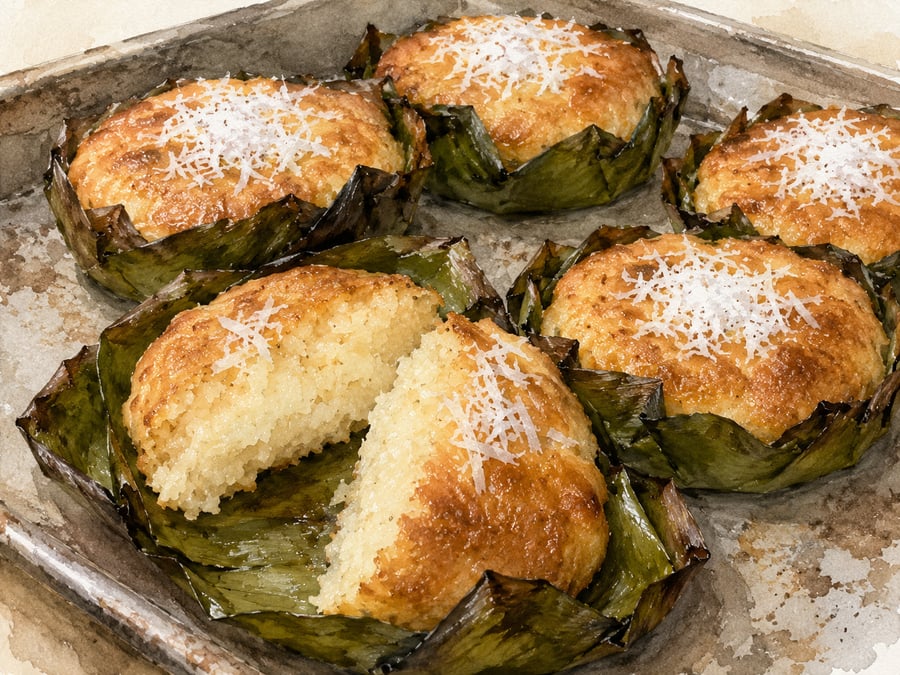
Bibingka is the soft, lightly sweet coconut cake Filipino families have baked at home in Hawaii for generations, then carried to Christmas tables, baptisms, and funeral spreads across the islands. The base is rice flour and coconut milk. Done right, the cake comes out deep golden across the top with a thin caramelized crust at the edges, and the inside should be tender enough that you can split a square with the side of a fork.
Filipino contract workers — the sakadas — arrived in Hawaii in December 1906 to work the sugar plantations, and bibingka came with them. In the Philippines the traditional version is baked in a clay pot lined with banana leaves over hot coals. In Hawaii kitchens it shifted into a sheet-pan dessert with butter folded in — the kind of thing a tired mother could mix together and slide into the oven before bed. That butter-rich, sheet-pan version is the bibingka my family bakes, and the one most island home cooks I know reach for.
At a glance
9-inch square pan, 12 to 16 pieces
15 minutes
45 to 55 minutes
Easy
Ingredients
For the batter
- 2 cups mochiko sweet rice flour
- 1 1/2 cups granulated sugar
- 1 teaspoon baking powder
- 1/2 teaspoon kosher salt
- 1 (13.5 oz) can unsweetened coconut milk
- 1/2 cup evaporated milk
- 1/2 cup unsalted butter, melted and cooled slightly
- 3 large eggs, lightly beaten
- 1 teaspoon vanilla extract
For the top
- 1/4 cup unsweetened shredded coconut (optional)
- 2 tablespoons granulated sugar (optional, for the crust)
Equipment
- 9-inch square baking pan
- Parchment paper
- Large mixing bowl and whisk
- Sifter or fine strainer
To serve
- Strong coffee or iced milk tea
- Optional: a thin smear of butter on a warm square
Method
- Prep the pan. Heat the oven to 350°F. Line a 9-inch square pan with parchment, leaving a 2-inch overhang on two sides so you can lift the cake out later. Lightly butter the parchment.
- Whisk the dry ingredients. In a large bowl, sift together the mochiko, sugar, baking powder, and salt. Sifting matters — mochiko clumps, and a clumpy batter bakes streaky.
- Combine the wet ingredients. In a separate bowl whisk the coconut milk, evaporated milk, melted butter, eggs, and vanilla until smooth.
- Bring it together. Pour the wet mixture into the dry and whisk until fully smooth with no lumps. The batter will be loose, almost like a thin pancake batter. That is correct.
- Bake. Pour into the prepared pan. For a crisp sugary top, scatter the shredded coconut and the 2 tablespoons of sugar over the surface. Bake on the middle rack for 45 to 55 minutes, until the top is deep golden, the edges pull slightly from the pan, and a toothpick inserted in the center comes out with just a few moist crumbs. The cake will look set but still soft.
- Cool and slice. Cool in the pan for 20 minutes, then lift out with the parchment overhang and finish cooling on a rack. Slice into 12 or 16 squares. Bibingka eats best at room temperature with a strong cup of coffee.
Notes from a local cook
Mochiko, not regular rice flour. The texture rests on sweet glutinous rice flour. Plain rice flour bakes drier and grainier, and all-purpose flour turns it into a different cake entirely. Koda Farms mochiko — the box with the blue star — is the brand I grew up with and the one I see called for by name in most Hawaii recipes.
Coconut milk: full-fat, unsweetened. Light coconut milk thins the batter out and the cake bakes pale and gummy. Shake the can hard before opening so the fat and the water are integrated.
The edges are the prize. The thin caramelized rim around the corners of the pan — where the butter and sugar have toasted against the parchment — is the part everyone fights over. Resist the urge to under-bake. A 5-minute longer bake gives you that edge.
Storage. Keep covered at room temperature for two days, or refrigerate for up to a week. The texture firms up cold; let a square come back to room temperature, or warm it 10 seconds in the microwave, before eating.
While You're on the Islands
Eat it made by someone else. In my experience, bibingka in Hawaii lives mostly in home kitchens rather than on restaurant menus. The best versions I've had came from family bakers and Filipino community gatherings — church bazaars, baptisms, Christmas spreads — rather than a storefront.
Find it on island. If you want to go looking, Waipahu on Oahu is the place to start. It's the heart of Oahu's Filipino community and home to the Filipino Community Center, with a dense cluster of Filipino bakeshops and lunch counters nearby. On Maui, parishes with strong Filipino congregations such as St. Anthony in Wailuku and Maria Lanakila in Lahaina hold bazaars and festivals where Filipino home cooks bring sweets to the table; what's on offer varies by event, so check the parish calendar before driving over. For current dates and other island Filipino events, see our events calendar.
Bring It Home
What you can substitute, what you can't: rice flour, coconut milk, and banana leaves (for lining the pan, if you want the authentic aroma) are all available at Filipino and Asian grocery stores on the mainland — nothing in this recipe is Hawaii-exclusive, so it's an easy one to keep making once you're home.